Investigate the basic and advanced principles of dental implant shapes and structures. Familiarize yourself with single-piece and two-piece implants to make well-informed choices.


1. According to whether the abutment and implant are a one-piece structure or two-piece structure, implants are divided into single-piece implants and two-piece implants.
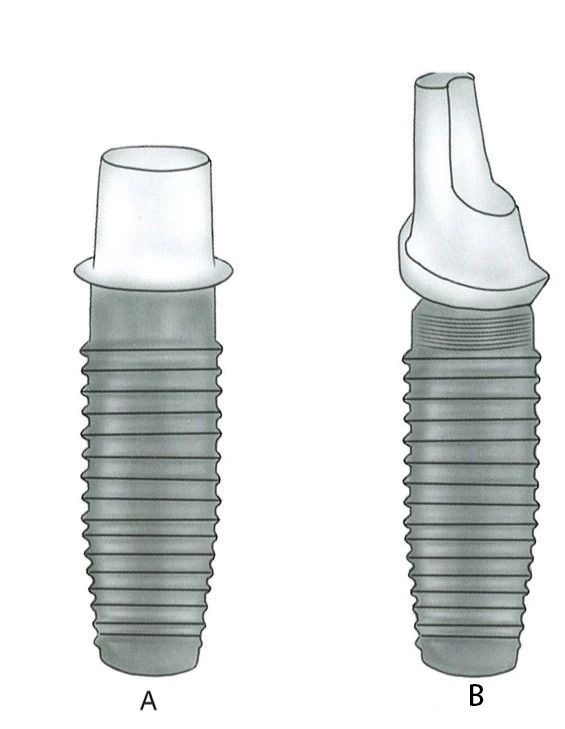
A- Single-piece
B- Two-piece
Single-piece implant: The abutment and implant are connected as one seamless unit, without any gaps. The implant and abutment are placed during one surgical procedure. There is no relative movement between the implant and the abutment, but the abutment is directly exposed to the oral cavity, making it more susceptible to external forces. Additionally, it cannot adapt to a variety of oral occlusal conditions and is rarely used today.
Two-piece implant: The implant and abutment are two independent components. They are connected as one unit through a screw in the center of the implant. Currently, except for narrow-neck implants, most implants are two-piece implants.
2. According to the neck design of the implant, implants are divided into bone-level implants and soft tissue-level implants.
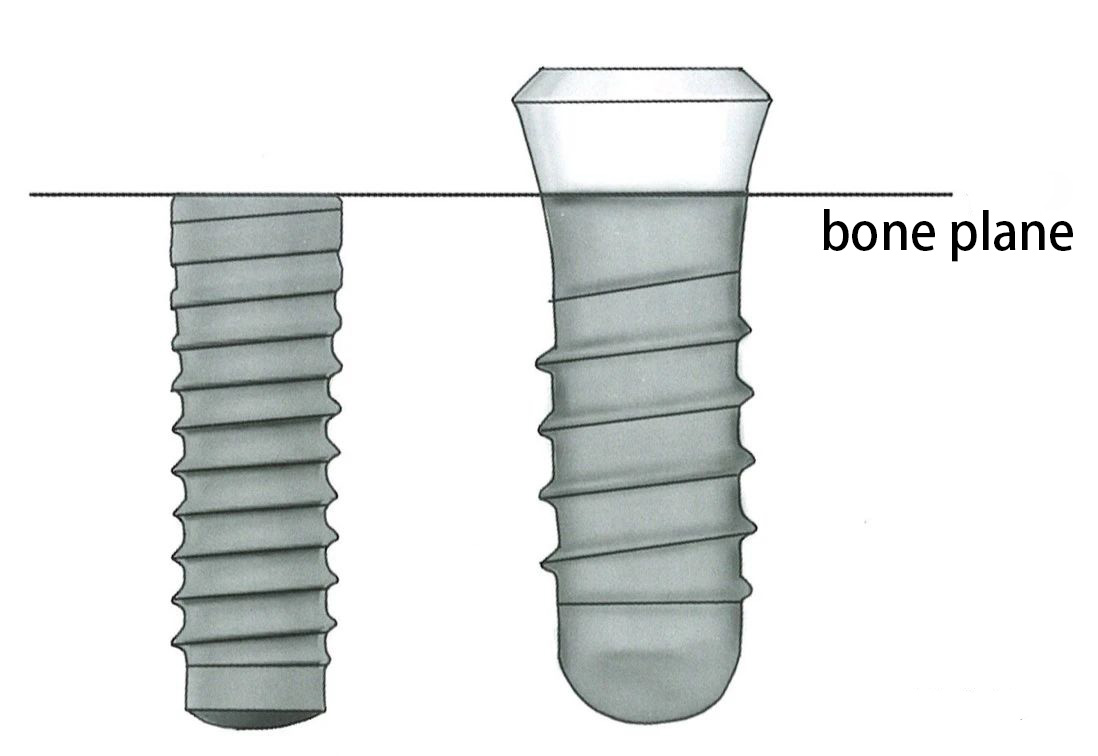
Bone-level
Bone-level implants: The implant platform is aligned with or located at the root level of the alveolar ridge crest. The neck is designed with either a smooth surface (which facilitates cleaning after marginal bone resorption) or a rough surface (which promotes osseointegration).
Soft tissue-level implants: The smooth neck of the implant is located within the soft tissue, while the rough part of the implant is embedded in the bone to achieve osseointegration. The smooth neck and soft tissue heal to form a soft tissue seal, preventing bacterial invasion. The micro-gap between the soft tissue-level implant and the abutment is more towards the crown side, reducing micro-movement at the connection and preventing pathogen-induced irritation to the surrounding bone. This reduces the possibility of gingival shaping during the second-phase surgery and lowers the risk of damage to the soft tissue seal.
1. The diameter of the implant body is divided into the inner diameter (which excludes the threads) and the outer diameter (which includes the threads). Typically, the outer diameter of the implant is referred to as the implant body diameter, also called the implant diameter in clinical terms.
It is generally believed that increasing the diameter of the implant is more beneficial for enhancing osseointegration strength than increasing the length of the implant.
2. The length of the implant refers to the portion of the implant that is embedded in the bone. Currently, bone-level implants refer to the entire length of the implant; soft tissue-level implants refer to the length of the rough surface portion of the implant body, excluding the smooth neck portion. Implants shorter than 8 millimeters are also called short implants.
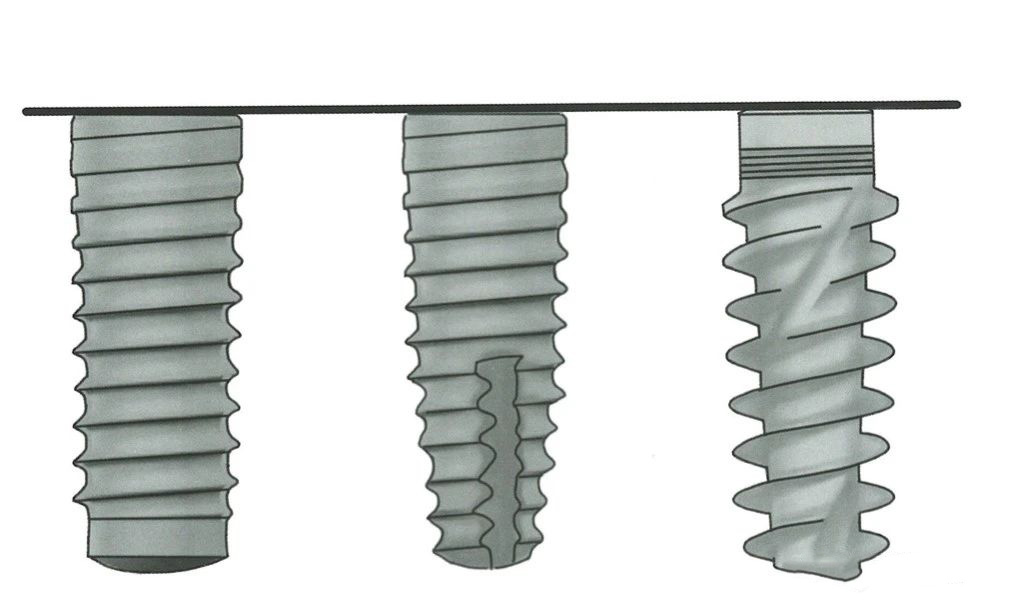
▲ From left to right: Cylindrical, Root-shaped, Biconical shape
The design of the implant shape aims to convert shear forces into compressive forces, and distribute stresses to the appropriate areas. Implant shapes include cylindrical, root-shaped, and biconical designs.
Root-shaped implants are suitable for cases where the mesiodistal distance at the apex of the edentulous area is small, or the bone thickness at the apex is insufficient. These implants have stronger self-tapping capabilities than cylindrical implants. Biconical implants have a tapered shape at both the upper and lower portions, representing the latest design for implants.
In the early stages, implant surfaces were mechanically smooth. Currently, most implant surfaces are roughened. After implantation, osteoblasts can directly adhere to the surface and promote bone growth, which means osseointegration occurs through direct contact with the bone.
Common surface treatments include titanium plasma spraying (Nobel), large particle acid etching sandblasting (ITI), acid etching, anodization, hydroxyapatite coating, and others.
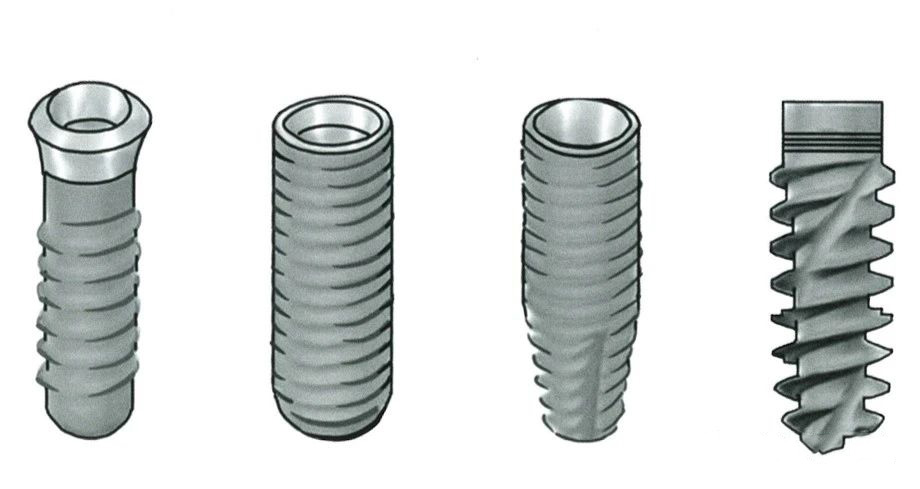
▲ From left to right: Increasing self-tapping ability
1. The greater the taper of the implant, the sharper the thread edges, and the deeper the cutting grooves, the stronger the self-tapping ability. Implants with a strong self-tapping ability allow for a larger diameter difference between the implant and the prepared implant site. During insertion, good stability is achieved through bone compression.
2. The degree of bone compression can be estimated by the insertion torque during implantation. Generally, the insertion torque should be less than 50 N·cm.
If the insertion torque is less than 10 N·cm, submerged healing is chosen;
If the insertion torque exceeds 15 N·cm, transgingival healing is preferred;
If the insertion torque exceeds 35 N·cm, immediate loading is recommended. It should never exceed 60 N·cm.
3. The cortical bone area has low plasticity, poor blood supply, and low compressive tolerance, while the trabecular bone is surrounded by connective tissue rich in blood vessels. Compression of the trabecular bone does not cause local blood circulation problems. Therefore, bone compression should be dispersed into the trabecular bone to avoid excessive pressure on the cortical bone, which could cause bone resorption.

▲ From left to right: Square, Sawtooth, V-shaped
This refers to the pitch, depth, and shape of the threads, which affect the self-tapping ability, primary stability, and stress distribution of the implant. The thread shapes typically include sawtooth, square, and V-shaped threads.
Current research shows that the most suitable thread width is 0.18-0.3 mm, with a depth of 0.35-0.5 mm.
Some implants have a double-helix or triple-helix structure, where one rotation of the implant results in a depth twice or three times that of a single-helix implant.
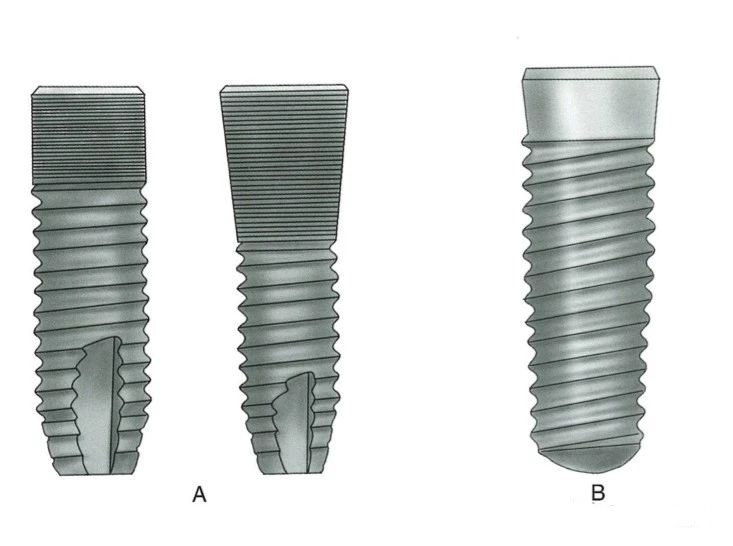
A- Neck with dense threads
B- Smooth neck
1. Whether there is a smooth neck collar: Soft tissue-level implants have a smooth neck design, and some bone-level implants also feature this design.
2. The roughness of the neck can be divided into smooth neck collars and micro-rough neck collars.
3. The diameter of the neck is classified into wide-neck implants (where the neck diameter is larger than the body), standard-neck implants, and narrow-neck implants (where the neck diameter is smaller than the body).

▲ From left to right: Wide neck, Standard neck, Narrow neck
The apex may be round or conical in shape.
Generally speaking, implants with a rounded apex have weaker self-tapping abilities. Therefore, areas with higher bone density should undergo threading first, followed by implant placement. However, implants with a conical apex have better self-tapping ability. When the bone density is medium or low, the implant's self-tapping ability can compress the surrounding trabecular bone, achieving good initial stability. At the same time, the bone debris produced during implantation accumulates in the space created by the cutting grooves, generating bone compression. This increases the contact area between the bone tissue and the implant.